What is brow lamination?
Brow lamination exploded onto the beauty scene circa 2018, with the technique having originated in Russia. Since then, this brow treatment has taken the industry by storm and the brushed-up, fluffy, brow trend shows no signs of slowing down.
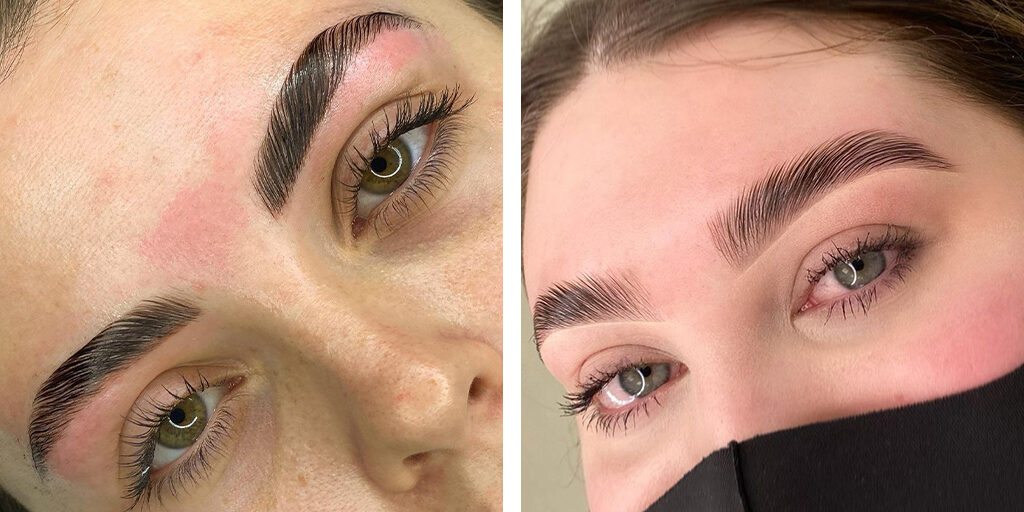
In simple terms, a brow lamination acts as a perm for your natural brow hairs. It is a semi-permanent treatment which sets and tames unruly brow hairs and creates a long-lasting brushed up effect which requires little maintenance.
Like permanent makeup, eyebrow lamination aims to save clients time in the morning, allowing them to get up and go without having to apply brow soap or gel products every day to keep hairs in place.
Brow lamination is suitable for clients with curly or unruly eyebrow hairs, clients with thinner brows wanting some more volume or for those who simply enjoy the fluffy brow look! A successful brow lamination can create the illusion of a higher arch, longer tail and overall fuller brows. To get the most out of a treatment, clients should let their brows grow out for at least 3 weeks or as long as possible prior to the appointment.
How does brow lamination work?
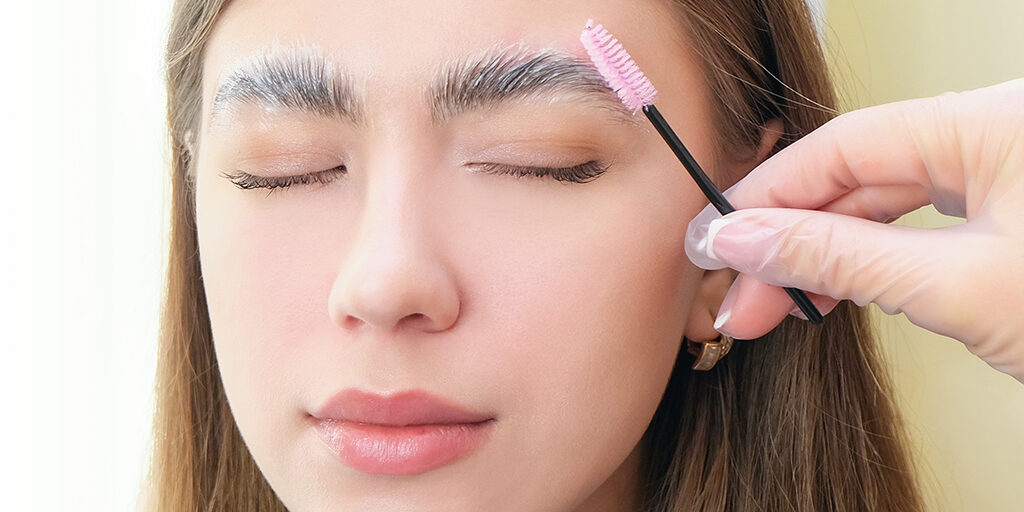
Brow lamination is usually a 3-step process which involves applying multiple formulas on to the brow hairs to lift, set and nourish for a long-lasting fluffy brow.
Step 1: The first step is to apply the ‘lifting’ formula to the brows. This formula aims to break down the bonds in each hair to allow them to be moved into a new shape.
Step 2: The setting formula or ‘neutraliser’ is used in step 2 to reform the hair bonds into their new, brushed-up shape.
Step 3: In the final step of the treatment, a nourishing cream or oil is applied to replenish any moisture lost during the lamination process and to keep brow hairs soft and healthy. The nourishing formula also soothes any skin irritation which may have occurred during steps 1 and 2.
How long do results last?
If the treatment is carried out by a trained brow technician and the client cares for the area properly afterwards, the results can last up to 2 months. Clients do have the option of prolonging results and leaving a greater amount of time between treatments by using a small amount of brow gel or soap to help set the hairs in place once they begin to move back.
Is brow lamination safe?
As with any beauty procedure, there are minimal risks and clients may experience some redness, swelling or itching/irritation after lamination. Artists are working with chemicals close to the eye area, but as long as clients only go to fully trained technicians who carry out treatments in a hygienic salon or clinic, they are in safe hands.
Clients with psoriasis, eczema, rosacea or a history of contact dermatitis unfortunately may not be suitable for this treatment.
It’s also worth noting that the brow lamination process can cause dryness in the brow area, so most artists recommend that clients use a nourishing oil at home following their treatment to hydrate the brow hairs and skin beneath.
Clients are at a greater risk of dryness or damage to the brow hairs if they repeat the treatment too soon. It is recommended to wait at least 6 weeks between each appointment, but ideally longer to reduce this risk.
Do you need a patch test for Brow Lamination?
Yes! Brow artists should always offer a consultation prior to treatment to ensure the client doesn’t have any pre-existing skin conditions which may increase their risk of adverse reactions. This should also include a 24 hour patch test to make sure there’s no signs of redness, itching, irritation, inflammation, etc which would indicate an adverse reaction to the solutions.
Can a client have brow lamination if they have PMU?
Of course! In fact, the brow lamination treatment can actually compliment permanent makeup and enhance existing results. As long as the permanent make-up is fully healed and the client has waited at least 6 weeks after the PMU procedure to have lamination, it is completely safe.
Clients with quite sparse brows who are seeking a fuller brow look may benefit from permanent makeup first and then brow lamination, as lamination alone may not produce the desired results.
What brow lamination products are available at Killer Beauty?
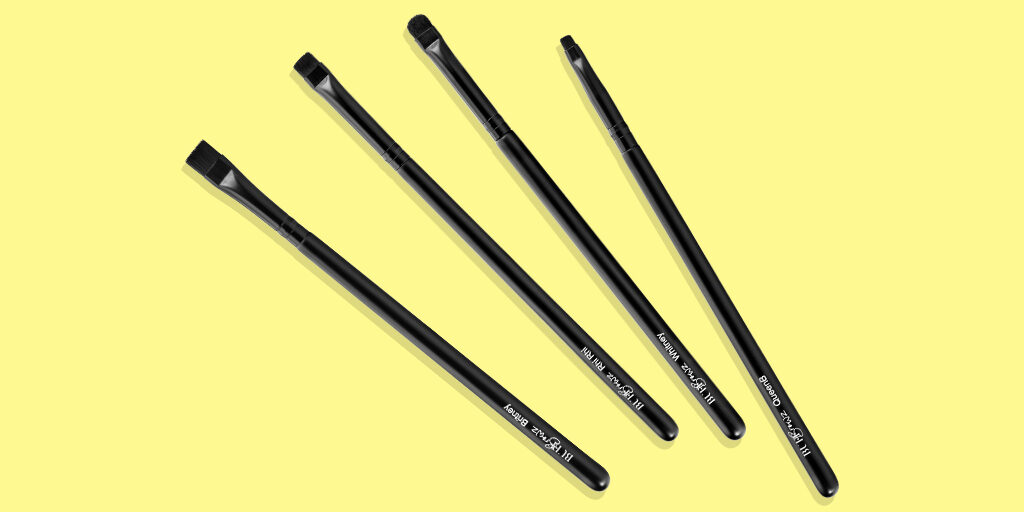
Prior to applying the brow lamination solutions, most artists would map out the brows and use a pen or pencil to pre-draw the brow shape to give an idea of how the finished result should sit.
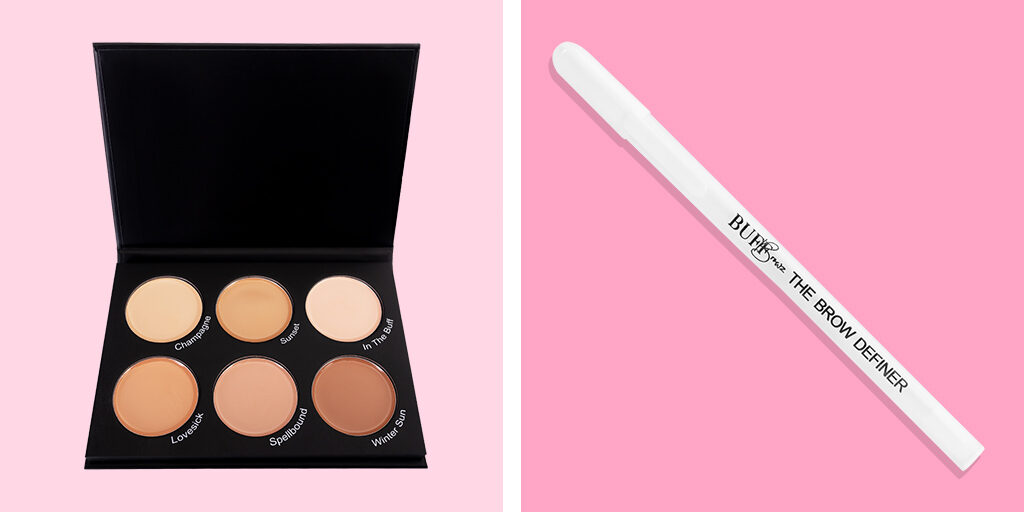
For these steps, we would recommend using the Killer Beauty Brow Rulers to map out the shape and products such as the Brow Definer, the Bare Necessities Pallet and the Basic Brush collection from Buff Browz to create a crisp, clear pre-draw.
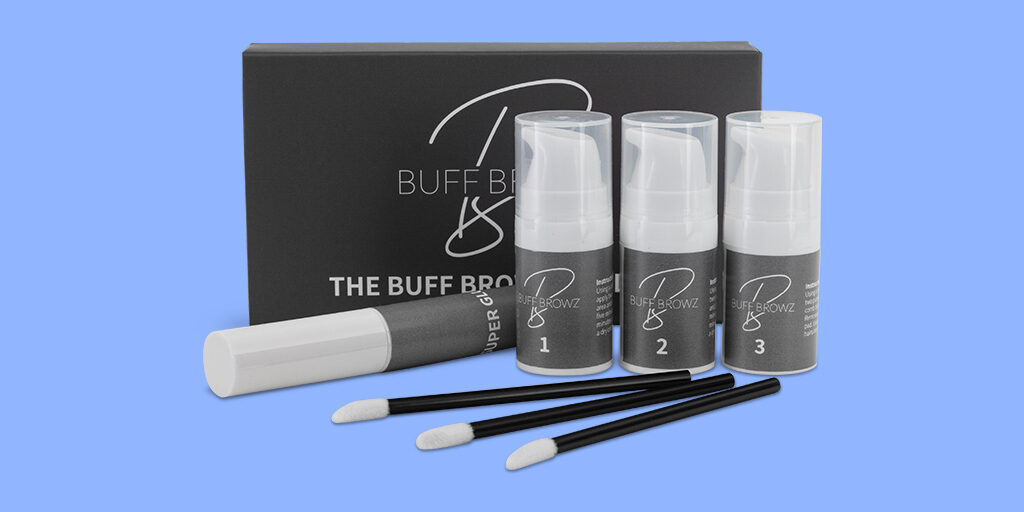
Prior to applying the step 1 formula, artists may also wish to use a product like the Buff Browz Lamination Glue to set the brow hairs in the desired position. Artists can then begin the lamination process using the Buff Browz Lamination kit – which is available in 3 x 5ml or 3 x 20ml bottles depending on how many clients you wish to treat per kit.
Another mega-popular kit we stock is the Brow Daddy Brow Lift kit which comes with 3 solutions and easy-to-follow instructions. Formulated by expert chemists, this Brow Lift kit aims to 'lift', 'set' and 'nourish' the brows during the lamination process, for long-lasting fluffy brows.
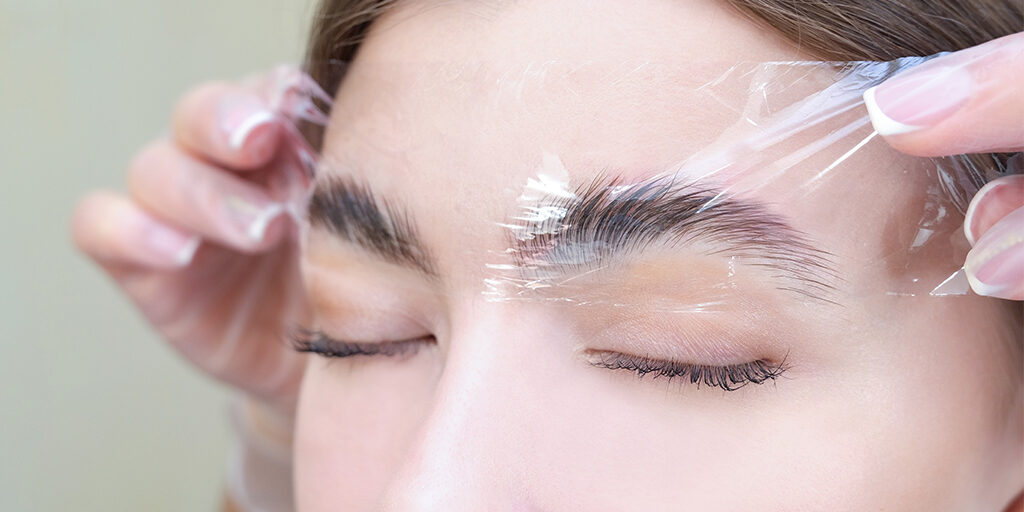
Other tools that may come in handy during a brow lamination treatment include spoolies, fine tip brushes or the Killer Beauty Eyebrow Film to apply during the lifting & setting steps.
There you go! The Killer Beauty guide to everything brow lamination and our go-to products for achieving gorgeous, fluffy brows on your clients. We are seeing more and more PMU artists training in this treatment and offering it to their clients alongside permanent makeup and we love seeing the results!